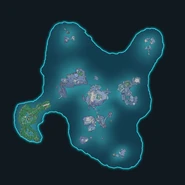
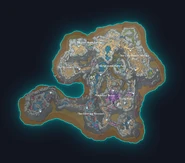
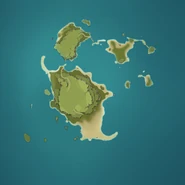
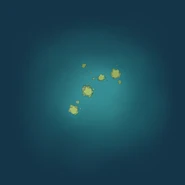
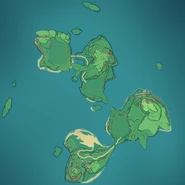
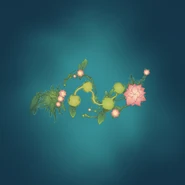
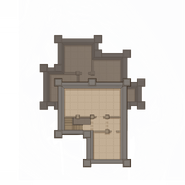
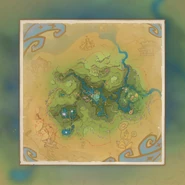
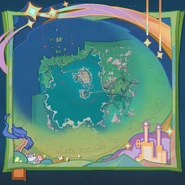
The Map is a Game System that displays and represents the world. It can be accessed by pressing the Minimap in the top left of the screen, opening from Paimon Menu > Map, pressing ![]() > Map (via the joystick) on PlayStation, or pressing M on PC. Teleport Waypoints, Statues of The Seven, Domains, and certain locations can be teleported to by selecting them on the Map and pressing "Teleport."
> Map (via the joystick) on PlayStation, or pressing M on PC. Teleport Waypoints, Statues of The Seven, Domains, and certain locations can be teleported to by selecting them on the Map and pressing "Teleport."
Quest Domains do not show up on the Map. Instances do not show up on the Map unless they have a special marker.
Most Subareas are labeled on the Map. The current area and its Exploration Progress is labeled at the bottom right of the Map. When fully zoomed out, Domains and areas (with their Exploration Progress percentage) are labeled on the Map. The Exploration Progress percentage is only visible after the map is revealed (i.e. the Statue of The Seven or Inscribed Map have been touched).
Other information available on the Map Menu include Notifications, Tabs, Spiral Abyss and Imaginarium Theater progress, and Original Resin count.
Select the gear icon at the bottom left of the screen to access the Map Settings.
Map Area[]
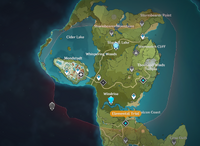
Available map area before completion of The Outlander Who Caught the Wind
While the player can move the Map around and view inaccessible areas, the player cannot venture into Out of Bounds areas.
Upon beginning the game, the Map is initially limited to about half of Starfell Valley plus, roughly, Windrise, Falcon Coast, and Springvale. The Statue of The Seven in Windwail Highland cannot be accessed.
Upon completion of Prologue: Act I - The Outlander Who Caught the Wind, the rest of the map becomes available.
Unlocking a Statue of The Seven lights up that Statue's area on the Map. Touching the Inscribed Map unlocks Enkanomiya's Map, and progressing through The Chasm Delvers quest series unlocks the Map for The Chasm: Underground Mines. After fully lighting up a region's map, players will earn an achievement.
Tabs[]
Tabs can be accessed by clicking on the icon at the bottom right of the map screen. Tabs can be used to switch between different Maps and also to quickly switch between different regions of the Teyvat Map. Each tab can optionally have an icon on it if there are any Map Notifications or Quest Objectives in that Map or Region.
- List of Tabs
- Teyvat
- Areas
- Instances
- Serenitea Pot
- The Cat's Tail (When inside of The Cat's Tail)
- Theater Lobby (When inside Imaginarium Theater)
- Events
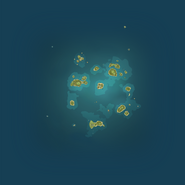
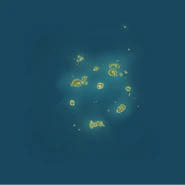
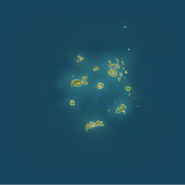
- Golden Apple Archipelago (During Version 1.6 and Version 2.8)
- Three Realms Gateway Offering (During Version 2.5)
- Veluriyam Mirage (During Version 3.8)
- Simulanka (During Version 4.8)
Pins[]
Pins are custom map markers that players can add to the Map. A maximum of 250 Pins can be placed on the Map. A custom name and icon can be set for each Pin.
Pins can be batched-deleted by selecting a pin, selecting ![]() to delete, add pins to delete, and deleting all selected pins.
to delete, add pins to delete, and deleting all selected pins.
Map Markers[]
The following are a list of markers that appear on the Map:
- Teyvat
When fully zoomed out, the following markers are shown:
When ~30% zoomed in, the following markers are also shown:
- Teleport Waypoints
- Portable Waypoint
- Waverider Waypoint
- Waverider
- Offering Systems' locations (Frostbearing Tree, Sacred Sakura, Tree of Dreams, Vourukasha Oasis - Amrita Pool, Fountain of Lucine, Carp's Rest: Votive Rainjade)
- Adventurers' Guild
- Pins
- Crystalfly Trap
- Ley Line Outcrops
- Bosses
- Enemies (if tracking with Adventurer Handbook)
- Quest Objectives
- Event Objectives and Markers
- Treasure Chests (once marked by Treasure Compasses)
- Alcor (after visiting the Alcor for the first time)
- Jade Chamber (after completing The Crane Returns on the Wind)
- The Narzissenkreuz Ordo (after completing Aqueous Tidemarks)
- Canotila and the Book of Revealing (after completing Book of Esoteric Revelations)
- Fortress of Meropide (after completing step 2 of Fortress of Meropide)
- Exploring the Tower of Gestalt (after starting step 8 of Search in the Algae Sea until completing Savior's Wake)
When ~70% zoomed in, the following markers are also shown. Some of these markers will allow you to teleport to the nearest Teleport Waypoint:
- Alchemy
- Souvenir Shops (With Wind Comes Glory, Mingxing Jewelry, Netsuke no Gen Crafts, Menakeri's Treasure Shop, Bertin's House of Curiosities)
- Blacksmiths (Schulz's Blacksmith, Hanfeng's Ironmongers, Amenoma Smithy, Shamshir's Smithy, Beaumont Workshop)
- Main Restaurants (Good Hunter, Wanmin Restaurant, Shimura's, Lambad's Tavern, Café Lutece)
- Other Restaurants (Angel's Share, Komore Teahouse, Puspa Café, Hotel Debord)
- Reputation NPCs (Coordinator, Knights of Favonius, Secretary, Ministry of Civil Affairs, Yashiro Commission Staff, Akademiya Liaison Officer, Chief Editor of The Steambird) (after completing their corresponding intro quests)
- Fishing Associations (Mondstadt, Liyue, Inazuma, Sumeru, Fontaine) (after completing Exploding Population)
- Open world matches (if "Search for Players" is toggled on)
- Knights of Favonius Headquarters
- Favonius Cathedral
- The Cat's Tail (after completing Come Try Genius Invokation TCG!)
- Toy Shop
- Chunming Teaworks
- "Designer" Wakamurasaki (after completing Omni-Ubiquity Net)
- Kamisato Estate
- House of Daena
- Sanctuary of Surasthana
- Temple of Silence (after completing Footprints Sunken Beneath the Sands)
- Palais Mermonia
- Opera Epiclese
- The Duke's Office
- Welfare Meals
- Rag and Bone Shop (until buying all its stock)
- Enkanomiya
When fully zoomed out everything is shown. This includes:
- The Chasm: Underground Mines
When fully zoomed out everything is shown. This includes:
- Sea of Bygone Eras
When fully zoomed out nothing is shown.
When ~30% zoomed in everything is shown. This includes:
- Serenitea Pot
When fully zoomed out, only Realm Waypoint: A Place to Return To, Sub-Space Waypoints and Companions are shown.
When ~20% zoomed in, the following markers are also shown:
When ~50% zoomed in, the following markers are also shown:
- Mansion
- A Path of Value: Jade Field
- A Path of Value: Luxuriant Glebe
- A Path of Value: Orderly Meadow
- The Cat's Tail
When fully zoomed out nothing is shown.
When ~55% zoomed in, the following markers are shown:
- Theater Lobby
When fully zoomed out nothing is shown.
When ~10% zoomed in, the following markers are shown:
Minimap Markers[]
The following markers only appear on the Minimap once close to them:
- Collectibles:
- Oculi
- Crimson Agates
- Lumenspar
- Key Sigils
- Activation Devices
- Plumes of Purifying Light
- Spirit Carp
- Echoing Conches (during Version 1.6, in the Golden Apple Archipelago)
- Moonchase Charms (during the Moonlight Seeker event)
- Voucher Boxes (during Version 3.8, in the Veluriyam Mirage)
- Exploration:
- General Goods shops
- Time Tunnels
- Perch feathers
- Jinn Shrines (with Jinni in the Magic Bottle — Liloupar equipped)
- Scylla
- Resources (with Resource Talents)
- Ore (with Ore Talents)
- Local Specialties (with Local Specialty Talents)
- Recovery Orbs (with Recovery Orb Talents)
Multi-Layered Map[]
The Multi-Layered Map allows the player to navigate between maps on different layers. The map layers will be displayed on the right side of the screen on the map.
Not every sub-map has a Teleport Waypoint or Domain within it. The visibility and names of some map layers may change based on exploration or quest progress.
Liyue[]
- Carp's Rest
- Chenlong Cleft Courtyard
- Lingshu Courtyard
- Adeptus's Repose
- Ancient Cave
- Wangshan Hall
- Wangshan Hall, Main Hall
- Wangshan Hall, Secret Chamber
- Huangcong Grounds
Inazuma[]
- Araumi Ruins
- Araumi Ruins: B1
- Araumi Ruins: B2
- Tsurumi Island Ruins
- Tsurumi Island Ruins: Upper Level
- Tsurumi Island Ruins: Lower Level
Sumeru[]
- Dharma Forest
- Electro Regisvine's Shaded Lair
- Mawtiyima: Concealed Sanctuary
- Fungus-Lit Cavern Path
- Zohrah Mushroom's Prison (Hidden Cavern: II before Starry Night Chapter)
- Zohrah Mushroom's Sanctum (Hidden Cavern: I before Starry Night Chapter)
- Devantaka Mountain: Water-Sealed Cavern
- Devantaka Mountain: Beneath the Giant
- Cavern's Postern & Dev's Cavern
- Cavern's Postern (Concealed Passage before Vimana Agama: Dev Delver Chapter)
- Dev's Cavern (Hidden Cavern before Vimana Agama: Dev Delver Chapter)
- Lost Cavern
- Mountain Cavern
- Mountain Cavern: F1
- Mountain Cavern: F2
- Mountain Cavern: F3
- Mountain Cavern: F4
- Chatrakam Cave: Northern Underground Ruins
- Chatrakam Cave: Southern Cavern
- Vanarana: Southern Path
- Jadeplume Terrorshroom's Lair
- Old Vanarana
- Old Vanarana: Sand-Embraced Home (Old Vanarana: Unknown Area I before For the Children of the Past)
- Old Vanarana: Land of Grounded Dreams (Old Vanarana: Unknown Area II before For the Children of the Past)
- Waterway to Ashvattha's Concourse
- The Rain's End (Apam Woods: Subterranean Cavern before A Prayer for Rain on the Fecund Land)
- Winding Path Beneath the Ruins (Craggy Waterway before The Rhythm that Nurtures the Sprout)
- Great Red Sand
- Dar al-Shifa: Subterranean Halls
- Dendro Hypostasis: Rooted Hollow
- Valley of Dahri
- Valley of Dahri, Mountain Interior: Upper Cavern
- Valley of Dahri, Mountain Interior: Lower Cavern
- Abdju Road
- Abdju Road: Upper Ruins
- Abdju Road: Lower Ruins
- Khemenu Temple
- Khemenu Temple: Entrance Hall (Khemenu Temple: Unknown Area I before An Introduction to Indoor Archaeology)
- Khemenu Temple: Underground Area (Khemenu Temple: Unknown Area II before An Introduction to Indoor Archaeology)
- Khemenu Temple: Underground Depths (Khemenu Temple: Unknown Area III before An Introduction to Indoor Archaeology)
- Khemenu Temple: Chamber of Secrets (Khemenu Temple: Unknown Area IV before An Introduction to Indoor Archaeology)
- The Mausoleum of King Deshret
- The Mausoleum of King Deshret: Main Hall
- The Mausoleum of King Deshret: Middle Level
- The Mausoleum of King Deshret: Lower Level
- The Mausoleum of King Deshret Eastern Section
- The Mausoleum of King Deshret Eastern Section: Sekhem Hall (The Mausoleum of King Deshret Eastern Section: Unknown Area I before The Secret of Al-Ahmar)
- The Mausoleum of King Deshret Eastern Section: Rock Cavern Area (The Mausoleum of King Deshret Eastern Section: Unknown Area II before The Secret of Al-Ahmar)
- The Mausoleum of King Deshret Northwest
- The Mausoleum of King Deshret Northwest: Rock Cavern Upper Level (The Mausoleum of King Deshret Northwest: Unknown Area I before The Secret of Al-Ahmar)
- The Mausoleum of King Deshret Northwest: Rock Cavern Middle Level (The Mausoleum of King Deshret Northwest: Unknown Area II before The Secret of Al-Ahmar)
- The Mausoleum of King Deshret Northwest: Rock Cavern Lower Level (The Mausoleum of King Deshret Northwest: Unknown Area III before The Secret of Al-Ahmar)
- The Mausoleum of King Deshret Southwest
- The Mausoleum of King Deshret Southwest: Rock Cavern Area (The Mausoleum of King Deshret Southwest: Unknown Area I before The Secret of Al-Ahmar)
- The Mausoleum of King Deshret Southwest: Middle Level Passage (The Mausoleum of King Deshret Southwest: Unknown Area II before The Secret of Al-Ahmar)
- The Mausoleum of King Deshret Southwest: Lower Ruins (The Mausoleum of King Deshret Southwest: Unknown Area III before Dual Evidence)
- The Mausoleum of King Deshret, Southwest Section: Underground Ruins
- The Mausoleum of King Deshret, Southern Section: Underground Ruins
- Temple of Gurabad
- Temple of Gurabad: Upper Level (Hidden Temple: Upper Level before The Temple Where Sand Flows Like Tears)
- Temple of Gurabad: Lower Level (Hidden Temple: Lower Level before The Temple Where Sand Flows Like Tears)
- Liloupar's Cell (Unearthly Prison before The Temple Where Sand Flows Like Tears)
- Mt. Damavand Ruins
- Mt. Damavand Ruins: Upper Level
- Mt. Damavand Ruins: Lower Level
- The Orchard of Pairidaeza (Enigmatic Land before completing Dune-Entombed Fecundity: Part III)
- Wenut Tunnels
- Wenut Tunnels: Upper Passage
- Wenut Tunnels: Upper Level
- Wenut Tunnels: Middle Level
- Wenut Tunnels: Lower Level
- Apep's Resort
- Girdle of the Sands
- Hangeh Afrasiyab
- Hangeh Afrasiyab: Upper Level (Unknown Cave Beneath the Desert: Upper Level before As the Khvarena's Light Shows)
- Hangeh Afrasiyab: Lower Level (Unknown Cave Beneath the Desert: Lower Level before As the Khvarena's Light Shows)
- Gate of Zulqarnain: Subterranean Defile
- Amrita Pool
- Harvisptokhm (Within the Mother Tree before The Hymn of Tir Yazad (Part 2))
- Madinat al-Nuhas
- Madinat al-Nuhas: Upper Level (Unknown Ruins in the Desert Depths: I before As the Khvarena's Light Shows: Nirodha)
- Madinat al-Nuhas: Lower Level (Unknown Ruins in the Desert Depths: II before As the Khvarena's Light Shows: Nirodha)
- Chemin Oublie
Fontaine[]
- Source of All Waters: The Great Fontaine Lake
- "Throne of Emperor of Fire and Iron"
- Scorching Cave
- Scorching Cave: Upper Level
- Scorching Cave: Lower Level
- Within Elynas
- Within Elynas: Northern Zone (Within Elynas before There Will Come Soft Rains in Series Ancient Colors: Act II - A Gradient of Dreams and Ochre)
- Within Elynas: Southern Zone (Within Elynas before There Will Come Soft Rains)
- Shipwreck
- Poisson
- Submerged Ruins
- Submerged Ruins: Outskirts
- Submerged Ruins: Central Quartier (Court of Fontaine - Submerged Ruins before Aqueous Tidemarks)
- Submerged Ruins: Northern Quartier (Court of Fontaine - Submerged Ruins before Aqueous Tidemarks)
- Mysterious Underwater Ruins
- Annapausis (Mysterious Underwater Ruins before The Narzissenkreuz Adventure in Series Ann of the Narzissenkreuz: Act I - The Narzissenkreuz Adventure)
- Convoluted Corridor at the Top of the Tall Tower (Mysterious Underwater Ruins before Ann's Story in Series Ann of the Narzissenkreuz: Act II - Kingdom Through the Looking-Glass)
- After Escaping the Convoluted Corridor (Mysterious Underwater Ruins before Ann's Story)
- Fleuve Cendre
- River Talionis
- Fortress of Meropide
- Fortress of Meropide: Reception Area
- Fortress of Meropide: Dormitory Block
- Fortress of Meropide: Administrative Area
- Fortress of Meropide: Production Zone Upper Level
- Fortress of Meropide: Production Zone Lower Level
- Fortress of Meropide: Abandoned Production Zone
- "The Court of the Millennial Pearl Seahorse"
- Submerged Stony Path
- Kuisel's Clockwork Workshop
- Kuisel's Clockwork Workshop: Entrance
- Kuisel's Clockwork Workshop: Middle Level
- Kuisel's Clockwork Workshop: Lower Level
- Underwater Cave
- Abandoned Laboratory
- Abandoned Laboratory: Upper Water Area
- Abandoned Laboratory: Ruins (Abandoned Laboratory: Ruin Outskirts before Treacherous Light of the Depths)
- Abandoned Laboratory: Lower Ruins
- Bravais' Hidden Study
- Hydrological Data Central Processing Station
- Erinnyes
- Erinnyes: Subterranean Cavern
- Erinnyes: Underground Water Vein
- Hauteclaire
- Water and Earth
- Eye of Water and Earth: Upper Level
- Eye of Water and Earth: Palace
- Cavern of Water and Earth: Peripheral Paths
- Erinnyes: Eastern Waterway
- Beneath Loch Urania
- Wilderness Cavern
- Wilderness Cavern
- Wilderness Cavern
- Mysterious Ruins
- Eerie Underground Facility
- Hidden Lab
- Faded Castle
- Faded Castle: Upper Level
- Faded Castle: Middle Level
- Faded Castle: Lower Level
- Faded Castle: Exhibition Hall
- Sea of Bygone Eras
- Machimos
- Path of the Ocean Pillars
- Caesareum Palace
- Portus Anticus
- Portus Anticus: Upper Level
- Portus Anticus: Lower Level
- Sea of Bygone Eras
- Capitolium
- Passage of Ianus
- Capitolium: Collegium Phonascorum
- Capitolium: Old Palace
- Domus Aurea
- Domus Aurea: Upper Level
- Domus Aurea: Lower Level
Natlan[]
- Settlement of the Children of Echoes
- Sacred Path Trial Ruins
- Sacred Path Trial Ruins: Entrance Hall
- Sacred Path Trial Ruins: Place of Parting Vows
- Sulfurous Veins
- Rift in the Mountains
- Waterlogged Ruins
- Land of Myriad Megaliths
- Beneath Coatepec Mountain
- Ancient Excavation Site
- Flamegranate Tree Roots
- Flamegranate Tree Roots: Warm Cave
- Flamegranate Tree Roots: Geothermal Surge
- Amidst the Stony Mountains
- Manse of Monetoo Murals
- Abandoned Temple's Sanctuary of Offering
- Extraction Research Center
- Extraction Research Center: Passage
- Extraction Research Center: Experimental Site
- Spiritwall Cave
- Underground Lava River
- Underground Lava River: Upper Level
- Underground Lava River: Lower Level
- The Upper Sanctum
- Heart of the Smoky Mountain
- Stadium of the Sacred Flame
- Stadium of the Sacred Flame: Fair and Temple
- Stadium of the Sacred Flame: Warrior's Rest Area
- Simulanka
- Constellation Metropole
- Castle's Base
- Castle's Central Section
- Astral Garden
Notifications[]
The following Notifications can appear in the top left of the screen:
- Teyvat
- General:
- Daily Commission Rewards
- Adventure Rank Rewards
- Expedition Reward
- Items Forged
- Ingredients Processed
- New Reputation Quest
- Reputation Reward (Nation)
- Bounty in progress
- New Envisaged Echoes stages unlocked
- Claim your Envisaged Echoes rewards
- Genius Invokation TCG:
- New available player(s) to challenge
- New available player may be invited to the Tavern
- New Tavern Challenges Available
- Player Level Rewards
- New Available Items at Card Shop
- New Card Player(s) at The Cat's Tail
- Offering Systems:
- Frostbearing Tree Offering Rewards
- Sacred Sakura's Favor Rewards
- Release Sacred Sakura's Favor Limit
- Electro Sigil Shop: Netsuke no Gen Crafts Unlocked
- Tree of Dreams Rewards
- Release Tree of Dreams Favor Limit
- Dendro Sigil Shop: Menakeri's Treasure Shop Unlocked
- Fountain of Lucine Offering Rewards
- Fountain of Lucine Max Level Increased
- Hydro Sigil Shop: Bertin's House of Curiosities Unlocked
- Serenitea Pot
- Maximum Realm Currency
- Maximum Realm Bounty
- The Teapot Traveling Salesman is here
- Claim your created furnishings
- There are plants in your fields awaiting harvest
- Companion Gifts
- The Cat's Tail
- Heated Battle Mode has started
- Theater Lobby
- Transcription missing
- Event-Specific
- Preliminary Investigation in Progress (Vishaps and Where to Find Them and Spectral Secrets)
- You have unclaimed seeds (Dreams of Bloom)
- Begin Domain (Energy Amplifier)
- Fortune Trove on Exchange (Kurious Kamera)
- Marvelous Merchandise (Marvelous Merchandise)
- New Vibro-Crystal Research Stage Unlocked (Vibro-Crystal Research)
- New Vibro-Crystal Verification Stage Unlocked (Vibro-Crystal Verification)
Tutorials[]
- About the Multi-Layered Map
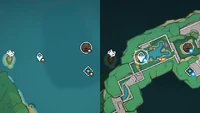 You will sometimes encounter Teleport Waypoint and Domain Entrance Map Pins bearing such sub-icons.
These symbols indicate that the destination is located in a multi-layered area. After you unlock the corresponding map layer, you can interact with said pins to open the corresponding sub-map.
You will sometimes encounter Teleport Waypoint and Domain Entrance Map Pins bearing such sub-icons.
These symbols indicate that the destination is located in a multi-layered area. After you unlock the corresponding map layer, you can interact with said pins to open the corresponding sub-map.
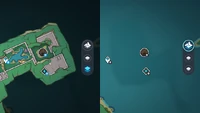 Use the layer markers on the right of the Map interface to switch between layers within the same group or select the big icon to return to the top-level map.
Use the layer markers on the right of the Map interface to switch between layers within the same group or select the big icon to return to the top-level map.
 When browsing map layers, the sub-icon of the Map Pin(s) for the current layer will appear in bright blue.
When browsing map layers, the sub-icon of the Map Pin(s) for the current layer will appear in bright blue.
 Dotted lines will be used for indicators (Quest targets, Event targets, etc.) that are not located in the current map layer.
Dotted lines will be used for indicators (Quest targets, Event targets, etc.) that are not located in the current map layer.
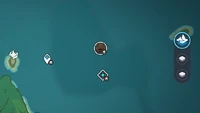 Additionally, when an area in the center of the map contains different layers that you have previously entered, you can use the layer-switching marker to swap over to the corresponding map.
Additionally, when an area in the center of the map contains different layers that you have previously entered, you can use the layer-switching marker to swap over to the corresponding map.
Map Settings[]
Map Settings can be accessed from the gear icon at the bottom left of the map menu.
| Setting | Options |
|---|---|
| Display Separately | |
| Domains only | Off/On Shows Domain names and their type. |
| Custom Display | |
| Custom Markers | Off/On |
| Search for Players | Off/On Shows Open World Matches for Genius Invokation TCG |
| Controller | |
| Cursor Sensitivity | 1 - 5 |
| Marker Sensitivity Range | 1 - 5 |
List of Maps[]
Teyvat[]
Enkanomiya[]
The Chasm: Underground Mines[]
Sea of Bygone Eras[]
Serenitea Pot[]
- Realm Layouts
- Main Buildings
The Cat's Tail[]
Theater Lobby[]
Golden Apple Archipelago[]
Three Realms Gateway Offering[]
Veluriyam Mirage[]
Simulanka[]
Trivia[]
- When in Domains, opening the map will open the Teyvat map and list the current region in the bottom right as "Teyvat" instead of a specific region.
- The Golden Apple Archipelago does not have exploration progress, so the map name "Golden Apple Archipelago" is at the bottom right.
- In Simulanka, the Multi-Layered Map for Constellation Metropole's castle places the button for the ground level layer under the ones of the other layers, instead of above them.
- During the Nilou step of the Archon Quest Jnagarbha Day in Chapter III: Act V - Akasha Pulses, the Kalpa Flame Rises, the player can open the Map but cannot see any markers.
Other Languages[]
| Language | Official Name |
|---|---|
| English | Map |
| Chinese (Simplified) | 地图 Dìtú |
| Chinese (Traditional) | 地圖 Dìtú |
| Japanese | マップ Mappu |
| Korean | 맵 Maep |
| Spanish | Mapa |
| French | Carte |
| Russian | Карта Karta |
| Thai | แผนที่ |
| Vietnamese | Bản Đồ |
| German | Karte |
| Indonesian | Peta |
| Portuguese | Mapa |
| Turkish | Harita |
| Italian | Mappa |
External Links[]
- Teyvat Interactive Map by HoYoLAB (Official)
- 提瓦特大地图 — 观测枢 by 米游社 (China Official)
- MapGenie's Interactive Map
Change History[]
- Introduced Natlan region and its respective tab with the following areas:
- Increased maximum number of map pins from 200 to 250.
- Introduced temporary Simulanka tab and area for the duration of the version.
- Added new map tab:
- Added new map icon:
- Theater Lobby (Point of Interest) in Mondstadt City, Starfell Valley, Mondstadt.
- Added Imaginarium Theater Act Progress.
- Added Nostoi Region area to Fontaine.
- Introduced Sea of Bygone Eras tab and area.
- Expanded Lokapala Jungle area in Sumeru with the following:
- Bayda Harbor (Subarea)
- Terrain adjustments:
- Adjusted the ruins near Scattered Ruins (Domain) in Mont Esus East, Liffey Region, Fontaine, and added its map icon.
- Moved "Domains only" and "Search for Players" toggles to a new Map Settings interface, alongside a new "Custom Markers" toggle.
- Updated map tab list to be more compact.
- Map visual corrections:
- Adjusted several misplaced or missing bridges, stairways and walls in Qiaoying Village and Yilong Wharf.
- Added missing bridge sections southeast of Chizhang Wall.
- Added missing ruins southeast of the Chenyu Vale: Upper Vale Statue of The Seven.
- Incorrectly reverted the color of a green space in the center of Yilong Wharf to blue.
- Map visual corrections:
- Corrected the color of a green space in the center of Yilong Wharf, which previously appeared blue.
- Added missing houses southwest of the Beryl Region Statue of The Seven.
- Added one missing house to the settlement northwest of the Court of Fontaine.
- Added the Chenyu Vale subregion to Liyue with the following areas:
- Normal Boss map icons of recently defeated Normal Bosses now display their respawn cooldown when clicked.
- Map visual corrections:
- Redefined the paths connecting to the crossroad in front of Mondstadt City's bridge.
- Added Erinnyes Forest and Morte Region areas to Fontaine.
- Terrain adjustments:
- Added Hydro Tulpa (Normal Boss) arena in Beryl Region, Fontaine, and its map icon.
- Added Shadow of Another World (Domain) rift in Salacia Plain, Court of Fontaine Region, Fontaine, and its map icon.
- Increased maximum number of map pins from 150 to 200.
- Added batch-delete pins function.
- Added the Fontaine Research Institute of Kinetic Energy Engineering Region and Liffey Region areas to Fontaine.
- Map visual corrections:
- Redefined the shoreline south of Liyue Harbor.
- Introduced Fontaine region and its respective tab with the following areas:
- Added "Multi-Layered Map" function.
- Introduced temporary Veluriyam Mirage tab and area for the duration of the version.
- Updated objectives for Archon Quests and certain World Quests to be listed on the map.
- Map tabs now have additional labels showing the current region and the region where Daily Commissions are located.
- Added the Girdle of the Sands subregion to Sumeru with the following areas:
- Terrain adjustments:
- Added Ayu's house near Qingce Village.
- Map visual corrections:
- Adjusted bridge and path in northwest Jueyun Karst.
- Map visual corrections:
- Adjusted paths leading into Qusayr Al-Inkhida' and Dunes of Steel caves.
- Added markers to the map icons of Teleport Waypoints and Domains that are in non-outdoor areas.
- Added Desert of Hadramaveth to Great Red Sand, Sumeru.
- Added "Search for Player" toggle for Genius Invokation TCG matches.
- Added new map tab:
- Added new map icons:
- The Cat's Tail (Point of Interest) in Mondstadt City, Starfell Valley, Mondstadt.
- City of Gold (Domain) in Khaj-Nisut, Land of Lower Setekh, Sumeru.
- Added new map icons:
- Sanctuary of Surasthana (Point of Interest) in The Akademiya, Sumeru City, Avidya Forest, Sumeru
- Joururi Workshop (Domain) in Chinvat Ravine, Avidya Forest, Sumeru
- Dendro Hypostasis (Normal Boss) to Land of Lower Setekh, Sumeru.
- Added the Great Red Sand subregion to Sumeru with the following areas:
- Added new map icons to older areas:
- Map visual corrections:
- Added missing dock east of Bubu Pharmacy.
- Adjusted Ruins of Dahri debris layout and color palette.
- Introduced Sumeru region and its respective tab with the following areas:
- Reintroduced temporary Golden Apple Archipelago tab and area for the duration of the version.
- Map visual corrections:
- Adjusted the ruins of the Guizhong Ballista and nearby cliff face.
- 2022-04-02:
- The interaction between Tsurumi Island's fog, Teleport Waypoints, and Statue of The Seven was updated so that Teleport Waypoints within foggy areas no longer show up on the map if the Statue of The Seven has not yet been touched. Previously, Teleport Waypoints inside foggy areas showed up on the map if the Statue of The Seven had not yet been touched, allowing players to bypass that aspect of Tsurumi Island's fog.
- 2022-03-30:
- Added The Chasm area to Liyue.
- Introduced The Chasm: Underground Mines tab and area.
- Updated sound effect of the Replenish Original Resin button.
- Introduced temporary Three Realms Gateway Offering tab and area for the duration of the version.
- Added new map icons to older areas:
- End of the Oneiric Euthymia (Domain) in Mt. Yougou, Narukami Island, Inazuma
- Original Resin Replenishment window will now have the exchange button grayed out upon reaching the maximum number of times.
- Introduced Enkanomiya tab and area.
- Added new map icons to older areas:
- Jade Chamber (Point of Interest) in Sea of Clouds, Liyue
- Replaced Teyvat tab with Mondstadt, Liyue, and Inazuma tabs.
- Added new map icons:
- Golden Wolflord (Normal Boss) in Tsurumi Island, Inazuma
- Slumbering Court (Domain) in Seirai Island, Inazuma
- Alcor (Point of Interest) in Guyun Stone Forest, Sea of Clouds, Liyue
- Added Tsurumi Island area to Inazuma.
- Daily Commission map icons now stay visible at 100% zoom.
- Map visual corrections:
- Adjusted the shape of the island south of Ritou's dock.
- Added the outline of the Statue of the Omnipresent God in Inazuma City.
- Adjusted the placement of two Treasure Hoarders tents on Yashiori Island.
- Added Watatsumi Island and Seirai Island areas to Inazuma.
- Added new map icons to older areas:
- Narukami Island: Tenshukaku (Domain) in Narukami Island
- Added Fishing Point map pin type.
- Map visual corrections:
- Removed a sandy islet south of Ritou.
- Introduced Inazuma region to the Teyvat tab with the following areas:
- Increased maximum number of map pins from 99 to 150.
- Added Sub-Space Waypoints to the Serenitea Pot, which show up as markers that can be teleported to in the Serenitea Pot tab.
- Introduced temporary Golden Apple Archipelago tab and area for the duration of the version.
- Spiral Abyss Progress and Original Resin positions at the top right of the map were swapped from "Spiral Abyss - Original Resin" to "Original Resin - Spiral Abyss".
- Introduced Map Tabs with the following tabs:
- Renamed Mt. Aozang to Mt. Aocang.
- Added new map icons:
- Cryo Hypostasis (Normal Boss) in Dragonspine, Mondstadt.
- Beneath the Dragon-Queller (Domain) in Nantianmen, Minlin, Liyue.
- Ridge Watch (Domain) in Bishui Plain, Liyue.
- Map visual corrections:
- Removed debris east of Hidden Palace of Guizang Formula.
- Map visual corrections:
- Added missing bridge west of Bubu Pharmacy.
- Terrain adjustments:
- Added the Primo Geovishap (Normal Boss) arena in Tianqiu Valley, Minlin, Liyue and its map icon.
- Map visual corrections:
- Removed path going over Qingxu Pool's waters.
- Added Dragonspine area to Mondstadt.
- Terrain adjustments:
- Re-added ceiling hole above the Cryo Regisvine arena in Mondstadt.
- Map visual corrections:
- Added Guizhong Ballista ruins near Mt. Tianheng.
- Added Exploration Progress when fully zoomed out and at bottom right of map.
- Expanded Sea of Clouds area in Liyue with the following:
- Golden House (Point of Interest)
- Enter the Golden House (Domain)
- Terrain adjustments:
- Removed ceiling hole above the Cryo Regisvine arena in Mondstadt.
- Map visual corrections:
- Corrected bridge placement northwest of Clear Pool and Mountain Cavern.
- The Map was released with the following regions and areas:
[]
| |||||||||||||||||||||||||||||||||||


