The Withering is a climate that appears in Sumeru.
See the Teyvat Interactive Map for their locations.
Despite the persistent re-emergence and spread of Withering Zones in-universe, regardless of the player's Archon Quest progress and the passage of time, Withering Zones in gameplay never expand and are always cleared permanently, and only a small number of Withering Zones that are tied to quests emerge after the player begins playing Genshin Impact.
Overview[]
In Withering Zones, the player will accumulate the Decay gauge, which debuffs the player's party and can cause full party death. Withering Zones can be cleared by using the power of Dendrograna on Withering Branches and defeating the enemies summoned by the Tumor of the Withering.
The only enemies present in Withering Zones unrelated to quests are Fungi, Ruin Machines, and Riftwolves.[verification needed]
All Tri-Lakshana Creatures found in a Withering Zone are in their scorched state and will not react to Dendro applications until the Withering Zone is cleared.
Decay[]
The Decay gauge is shared between characters for each player and has a maximum of 10 units. All Withering Zones have a minimum number of Decay units, which are marked with vertical notches and cannot be reduced.
In most Withering Zones, the Decay gauge's minimum is 2 units. The following Withering Zones have a minimum of 4 units instead:
- Old Vanarana
- The cave in Mawtiyima Forest
- A hole east of Devantaka Mountain
When the Decay gauge reaches 8 units, the player's peripheral vision will be slightly reduced. When the Decay gauge reaches 10 units, the player's peripheral vision will be continuously reduced until death.
Accumulation Rate[]
When hit by an attack from an enemy affected by The Withering (indicated by an icon of two red leaves over their HP bar), a Withering Branch, or a Fetid Bough, the player will accumulate 1 unit of Decay. In most Withering Zones, there is no other way for Decay to accumulate.
The following Withering Zones have Decay that naturally accumulates at a rate of about 1 unit per 10 seconds:
- Old Vanarana
- The cave in Mawtiyima Forest
Debuff[]
All characters in the party have their Resistances reduced by 4% and Max HP reduced by 9.5% for each unit of Decay accumulated.
Depletion[]
Most Withering Zones have a Candle of Life, which decreases accumulated Decay for nearby players at a rate of 1 unit per 0.5 seconds. Some Withering Zones have Seelies of Life, which have the same function.
Although it is rare for Teleport Waypoints to be located within a Withering Zone, these Teleport Waypoints can also decrease accumulated Decay for nearby players at the same rate.
Flames of Life will reduce Decay by 1 unit when approached and can only be used once, although they will respawn if the area is reloaded. Flames of Life usually appear only when Disciples of Decay are summoned, but some Withering Zones have Flames of Life present from the beginning.
Upon leaving a Withering Zone, the Decay gauge instantly disappears.
Death[]
If the player maintains a maxed Decay gauge of 10 units for 10 seconds, then all characters in their party will be killed with 100% HP Loss. If the active character's HP is not drained because of damage-nullifying i-frames or Constellations that allow characters to resist lethal damage, it will be drained in the following seconds. During these ten seconds, the screen borders will have a visual effect that continuously closes in, significantly reducing the player's peripheral vision.
Fetid Boughs[]
Fetid Boughs are environmental hazards in Withering Zones that look like budding flowers. Each Fetid Bough shoots a projectile at a player in its vicinity every 5 seconds. The player gains 1 unit of Decay if hit by the projectile.
Fetid Boughs can be destroyed with Dendrogranum coordinated attacks, but it is not required to destroy them to clear their Withering Zone.
The DMG dealt by Fetid Bough Attacks is calculated as . This DMG is considered True DMG and is unaffected by DEF, RES, or DMG Reduction. Level Multipliers for each level can be found in Elemental Reaction/Level Scaling § Level Multiplier.
Removal[]
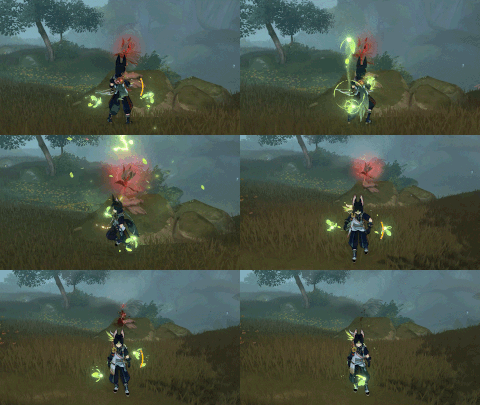
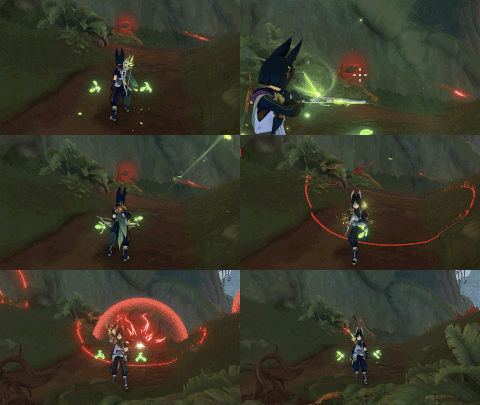
To clear a Withering Zone, players must use Dendrograna to destroy the Withering Branches with Charged Attacks or Aimed Shots.
Once all branches have been destroyed, the Tumor of the Withering at the center of the area will summon a stronger enemy, alternatively known as a Disciple of Decay. These enemies have a buff, indicated by a red swirling aura around them, that grants 15% increased Resistances and 10% increased ATK. Hitting Disciples of Decay with Dendro attacks or a Dendrogranum's coordinated attack will remove the buff for 13 seconds. Disciples of Decay may be accompanied by additional weaker monsters.
Once the Disciple of Decay and any monsters that spawned with it have been defeated, the Tumor of the Withering can be interacted with to be destroyed, even if the original enemies in the Withering Zone have not yet been defeated. Destroying the Tumor of the Withering will permanently eliminate the Withering Zone and spawn an Exquisite, Precious, or Luxurious Chest as a reward corresponding to the difficulty of the zone.
Destroying the Tumor of the Withering will also return all affected environmental Tri-Lakshana Creatures to their normal state and remove any Fetid Boughs that were not destroyed.
Withering Branches[]
When a Withering Branch is destroyed by a Dendrogranum coordinated attack, it will either explode, fire three shots at an angle, or fire three shots into the sky, dealing True Physical DMG and increasing the player's Decay by 1 unit if the player is hit.
The DMG dealt by Withering Branch Counterattack is calculated as . This DMG is considered True DMG and is unaffected by DEF, RES, or DMG Reduction. Level Multipliers for each level can be found in Elemental Reaction/Level Scaling § Level Multiplier.
Lore[]
The Withering was introduced as a result of King Deshret introducing forbidden knowledge to his people, causing the land around them to become weakened and affecting all who would wander into one. This disaster was temporarily halted by Greater Lord Rukkhadevata, although she had lost significant power and was reduced to the size of a child as a result.
While beings can survive in a Withering Zone, the effects are extremely harmful to humans, who require a Vision to simply resist its power. Even a brief exposure could cause serious effects; Rana, who only spent a few minutes in such a zone, felt sick and exhausted after leaving before falling into a coma that required Arana to bubble her for her own safety. Eleazar is the manifestation of the Withering on humans.
Withering Zones are initially created as a Nascent Zone which attracts a small amount of monsters and begins to corrupt the surrounding area. These nascent zones are too young to form Fetid Boughs and Withering Branches and thus can be removed once all the monsters are killed. If they manage to persist, then they begin to form both, grow larger into a tumor, have a larger area of effect and begin to affect people.
The Aranara call the Withering Marana, which is likely derived from the Sanskrit word maraṇa (Sanskrit: मरण) meaning "death" or "killing". They say that Marana has the power to turn Vana (forest) into Valuka (desert).[1] The Withering is also known as The Black Tide.[2]
The Withering re-emerged during the cataclysm, causing Rukkhadevata to sacrifice herself in order to prevent it from spreading rapidly across Sumeru. Cases of the Withering lowered, but it continued spreading all across Sumeru due to her taint in Irminsul to the point that they were appearing faster than the Forest Rangers could deal with them. After Lesser Lord Kusanali removed Rukkhadevata from Irminsul, the Withering stopped expanding and all traces of Eleazar were removed, though the zones that still remained prior to her removal remain and pose a threat.
During Nahida's Story Quest, Sapientia Oromasdis Chapter: Act II - Homecoming, it is revealed that the Withering was actually the "death" of elemental life-forms that originated from Apep's body, who were successfully able to escape its body when it was corrupted by the forbidden knowledge. The elemental life-forms themselves turned into Tumors of the Withering. After a Withering Zone is cleared, if the destroyed Tumor of the Withering contained any remaining life essence from its elemental life-form, it could be retrieved by another elemental life-form that was still alive and well.
Tutorial[]
- Dreadful Withering...
 The Withering is not a fixed location. Instead, it refers to areas that have been corroded by some sort of mysterious and ominous power. In these areas, characters will accumulate Decay. The speed of this accumulation will differ depending on the Withering Zone you're in.
The Withering is not a fixed location. Instead, it refers to areas that have been corroded by some sort of mysterious and ominous power. In these areas, characters will accumulate Decay. The speed of this accumulation will differ depending on the Withering Zone you're in.
 Depending on how much Decay you have accumulated, all your party members will have their All Elemental RES, Physical RES, and Max HP decreased. These stats will decrease more in accordance with the amount of Decay accrued.
Depending on how much Decay you have accumulated, all your party members will have their All Elemental RES, Physical RES, and Max HP decreased. These stats will decrease more in accordance with the amount of Decay accrued.
 If you remain within Withering Zones after you fully accumulate Decay, all your party members will fall.
If you remain within Withering Zones after you fully accumulate Decay, all your party members will fall.
 You must use the power of the Dendrograna to clear the Withering away. Only via this method can you destroy the Withering Branches that spread this corrosive power. Only when all the Withering Branches within a Withering Zone are destroyed can the Tumor of the Withering at the beating heart of the area be destroyed.
Most Withering Zones can be destroyed in this way, but...
You must use the power of the Dendrograna to clear the Withering away. Only via this method can you destroy the Withering Branches that spread this corrosive power. Only when all the Withering Branches within a Withering Zone are destroyed can the Tumor of the Withering at the beating heart of the area be destroyed.
Most Withering Zones can be destroyed in this way, but...
 Within the Withering Zones, Candles of Life and Flames of Life may appear and help to decrease the accumulation of Decay.
Prepare for the worst before entering the Withering Zones.
Within the Withering Zones, Candles of Life and Flames of Life may appear and help to decrease the accumulation of Decay.
Prepare for the worst before entering the Withering Zones.
- Dangers within the Withering Zone...
 There are other perils within the Withering Zones apart from Decay. Monsters that have been corroded by this environment and Fetid Boughs that grow in the area will attack characters within, causing Decay to accumulate...
There are other perils within the Withering Zones apart from Decay. Monsters that have been corroded by this environment and Fetid Boughs that grow in the area will attack characters within, causing Decay to accumulate...
 In addition, the Tumor of the Withering will exhort Disciples of Decay to come forth and attack. These are monsters who have utterly fallen under the influence of the Withering, and have the protection of the Withering against DMG. Use Dendro or Dendrograna to effectively destroy the shields guarding these monsters...
In addition, the Tumor of the Withering will exhort Disciples of Decay to come forth and attack. These are monsters who have utterly fallen under the influence of the Withering, and have the protection of the Withering against DMG. Use Dendro or Dendrograna to effectively destroy the shields guarding these monsters...
Description[]
- When exposed to the Withering, characters will accumulate Decay. The speed of this accumulation will differ depending on the Withering Zone you're in.
- Depending on how much Decay you have accumulated, all your party members will have their All Elemental RES, Physical RES, and Max HP decreased. These stats will decrease more in accordance with the amount of Decay accrued.
- If you remain within Withering Zones after you fully accumulate Decay, all your party members will fall.
- Destroying the Tumors of the Withering normally can eradicate the Withering nearby. Use Candle of Life or Flame of Life to diminish accrued Decay. Attacks by Decay Projectiles or monsters affected by the Withering will induce accelerated accumulation of Decay.
Soundtracks[]
| No. | Soundtrack Name | Album | Played In |
|---|---|---|---|
| 90 | In Barren Ashes | Forest of Jnana and Vidya | Sumeru (The Withering) |
| 91 | Struggle of Dying Embers | Forest of Jnana and Vidya | Combat in Sumeru (The Withering) |
| 92 | Feelings of Smothering | Forest of Jnana and Vidya | Sumeru (The Withering) Quests |
| 93 | Snare Awaiting | Forest of Jnana and Vidya | Combat in Sumeru (The Withering) |
| 94 | Dreamless Earth | Forest of Jnana and Vidya | Land of Grounded Dreams (prior to fighting Marana's Avatar) Quests |
| 95 | Fatal Confrontation | Forest of Jnana and Vidya | Combat in Land of Grounded Dreams: |
| 96 | Before the Light Fades | Forest of Jnana and Vidya | Combat in Land of Grounded Dreams: |
Trivia[]
- No wildlife or harvestable plant life, such as Ajilenakh Nuts, can be found in Withering Zones.
- Withering Zones look the same during both day and night.
- Tri-Lakshana Creatures who spawn outside of a Withering Zone and move inside one will not be considered as enemies who are affected by The Withering; they will not become scorched unless they come into contact with Pyro as usual, and their attacks do not increase Decay.
- All enemies found in non-quest Withering Zones that are not specially spawned for them respawn normally if they are defeated without the Tumor of the Withering becoming destroyable before their respawn time. Players may use this to access more Ruin Machines and Riftwolves than usual, at the cost of having less access to wildlife and other enemies like The Eremites.
- Disciples of Decay are often Elite Enemies and are usually related to the monsters already present; e.g., a zone with Rifthound Whelps will likely spawn a larger Riftwolf as a Disciple of Decay. An area that was originally filled with smaller Fungi enemies may have a large Fungi enemy as its Disciple of Decay accompanied by additional smaller Fungi enemies, or it may spawn a different enemy entirely, such as a Riftwolf.
- After destroying the Tumor of the Withering and reloading the area:
- Wildlife and harvestable plant life, such as Ajilenakh Nuts, will return.
- Additional enemies, such as The Eremites and more Fungi, may appear.
- Unused Flames of Life will no longer be present.
- After clearing a Withering Zone, Riftwolf enemies permanently disappear, and Fungi and Ruin Machine enemies that were not specially spawned for the Withering Zone may stay.
- The spiraling three-pronged symbol in Withering Branches, Fetid Boughs, and the projectiles shot by Fetid Boughs is also found in Valaya and Dendrogranum-Locked Rocks, but colored green instead of black and red.
- While facing enemies in the Withering, special battle music plays in place of the default battle music.
- The special battle music continues to play if the player leaves the area without leaving combat.
- The special battle music does not play if the player enters a Withering Zone while already in combat.
- In Withering Zones that are part of quests, other enemies that are normally not present in Withering Zones, such as Abyss Mages and Slimes, may be found.
- If a Withering Zone is reloaded before its three Withering Branches are destroyed, all destroyed Withering Branches and Fetid Boughs will respawn.
- If a Tumor of the Withering that is ready to be destroyed is left alone, no enemies will respawn in the Withering Zone.
- In a cinematic in the What Shape Does the Self Hold in Nahida's Story Quest, Sapientia Oromasdis Chapter: Act II - Homecoming, the Grounded Hydroshroom elemental life-form turns into a plant that looks like a healthy, yellow version of a Tumor of the Withering.
Gallery[]
See Also[]
Other Languages[]
| Language | Official Name | Literal Meaning |
|---|---|---|
| English | The Withering | — |
| Chinese (Simplified) | 死域 Sǐyù | Death Zone |
| Chinese (Traditional) | 死域 Sǐyù | |
| Japanese | 死域 Shiiki | Death Region[※][※] |
| Korean | 죽음의 땅 Jugeum-ui Ttang | Land of Death |
| Spanish | Zona marchita | Withered Zone |
| French | Siccité | Dryness |
| Russian | Увядание Uvyadaniye | Withering |
| Thai | แดนมรณะ Daen Marana | Zone of Death |
| Vietnamese | Tử VựcTử Vực | Death Zone[※][※] |
| German | Verwelkung | Withering |
| Indonesian | The Withering | — |
| Portuguese | O Definhamento | The Withering |
| Turkish | Solduran | Withering |
| Italian | L'Avvizzimento | The Wilting |

