Genshin Impact

Decode This Level's Puzzle Guide

Genshin Impact - How to Decode the Levels

Decode This Level's Puzzle is an objective in Savior's Wake quest in Genshin Impact 4.2. See how to solve the puzzles of the two levels and complete the objectives in this guide!

How to Decode the First Level's Puzzle

Step-by-Step Summary

  1. Rotate the Eliphas Beam to the southwest wall
  2. Go to the lower level
  3. Jump off the edge to reach a lower level

Rotate the Eliphas Beam to the Southwest Wall

Genshin - decoding the first level

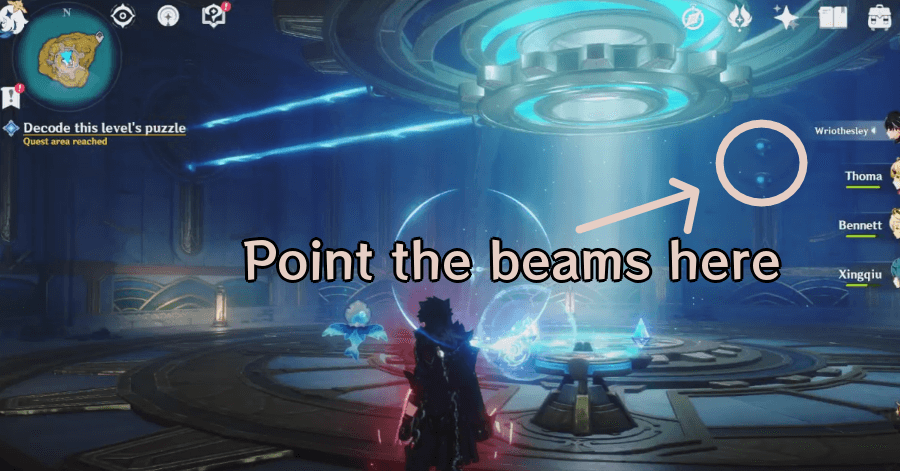
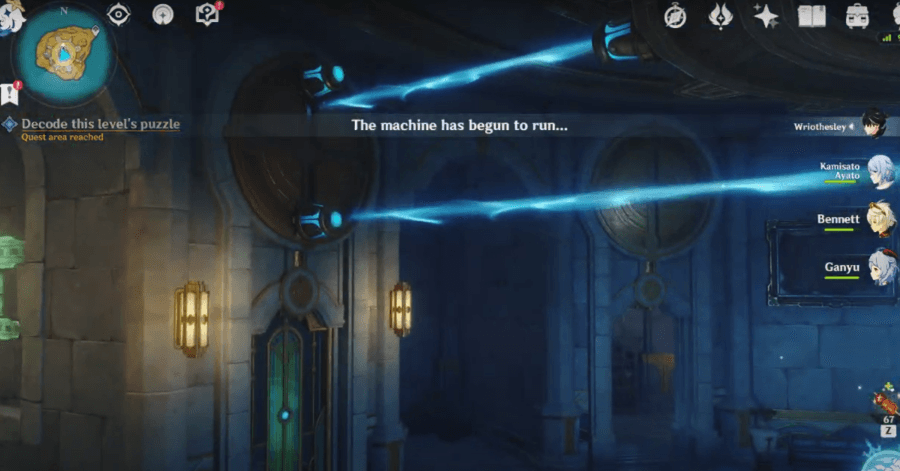
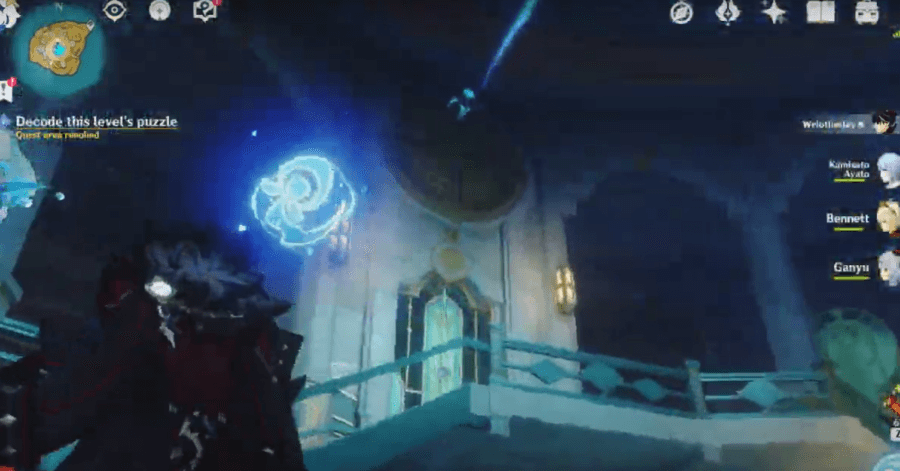
To decode this level's puzzle, interact with the orb on the capsule so you can move the Eliphas Beam in front of it. Rotate the mechanism so that the beams on the ceiling reaches the reticles on the southwest wall.

Go to the Lower Level

Genshin - going to the lower level

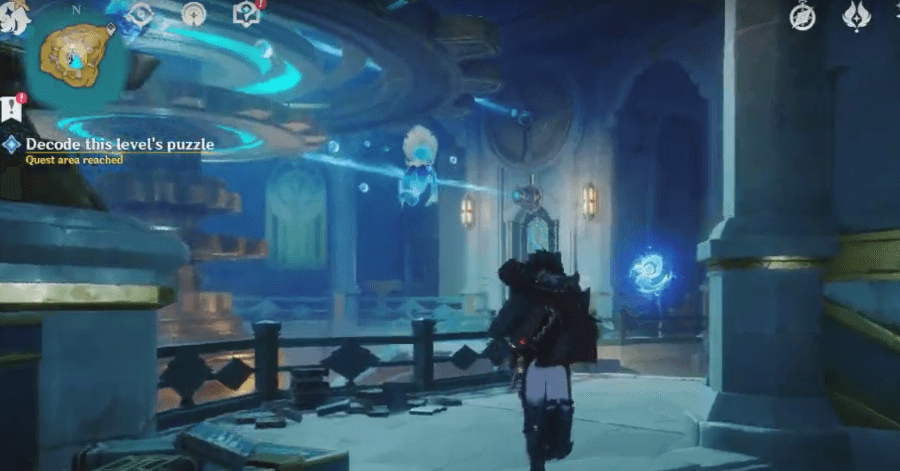
A new marker will appear at the center after completing the first objective. Stand on the marked spot to exit to the lower level.

Jump Off the Edge to Reach a Lower Level

Genshin - find the second level puzzle

Jump out of the tube where you're teleported to find a sealed chest, more mechanisms, and a dew bubble. Jump off the edge of this platform to find another floor leading to the next objective.

How to Decode the Second Level's Puzzle

Step-by-Step Summary

  1. Defeat the Recon Log Meks
  2. Activate the Mechanism and Go Down
  3. Defeat the Specialist Mek and Activate the Mechanism
  4. Unlock the Right Door for Another Mechanism
  5. Align the Two Beams and Use Them to Unlock the Left Door
  6. Defeat the Specialist Meks and Activate the Mechanism
  7. Obtain the First Root Cycle
  8. Obtain the Second Root Cycle
  9. Obtain the Third Root Cycle

Defeat the Recon Log Meks

Genshin - defeat the Recon Log Meks

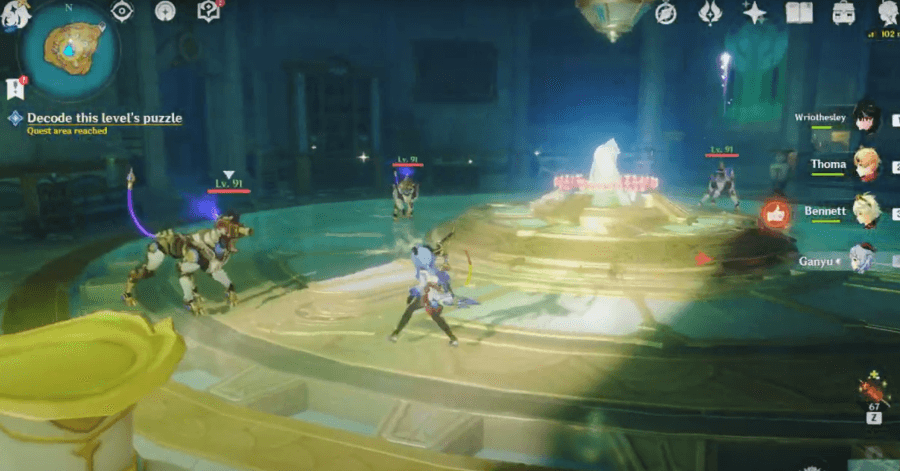
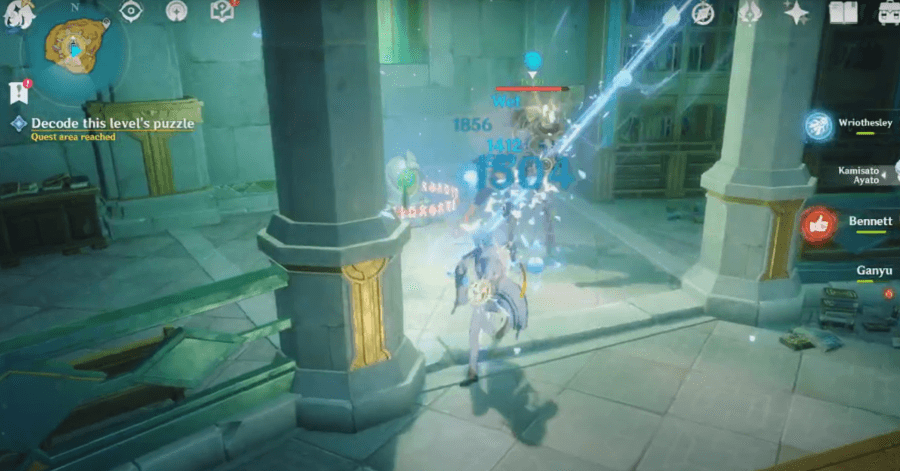
Deal with the four Recon Log Meks in the room to unseal the mechanism at the center.

Activate the Mechanism and Go Down

Genshin - activate the mechanism

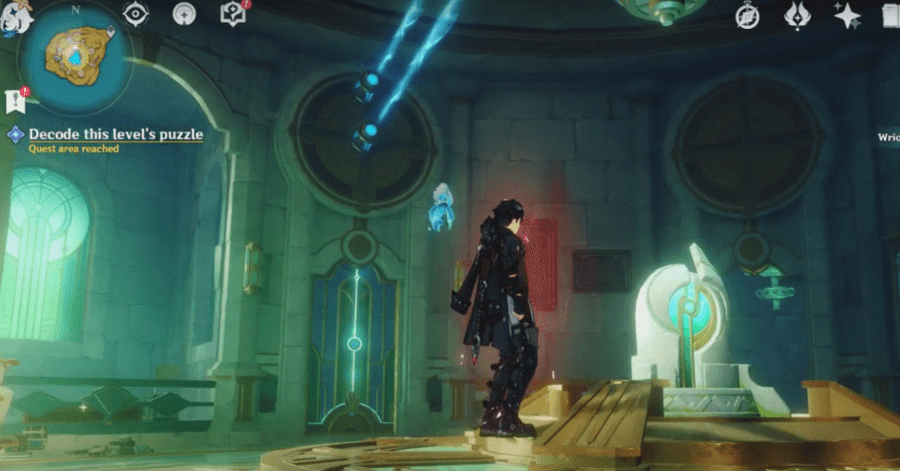
The mechanism should now be interactable. Use it to activate the Eliphas Beams and take the revealed platform down to the lower level.

Defeat the Specialist Mek and Activate the Mechanism

Genshin - defeat the Specialist Mek

Defeat the Assault Specialist Mek and activate the mechanism so you can move the Eliphas Beams

Unlock the Right Door for Another Mechanism

Genshin - unlock the right door

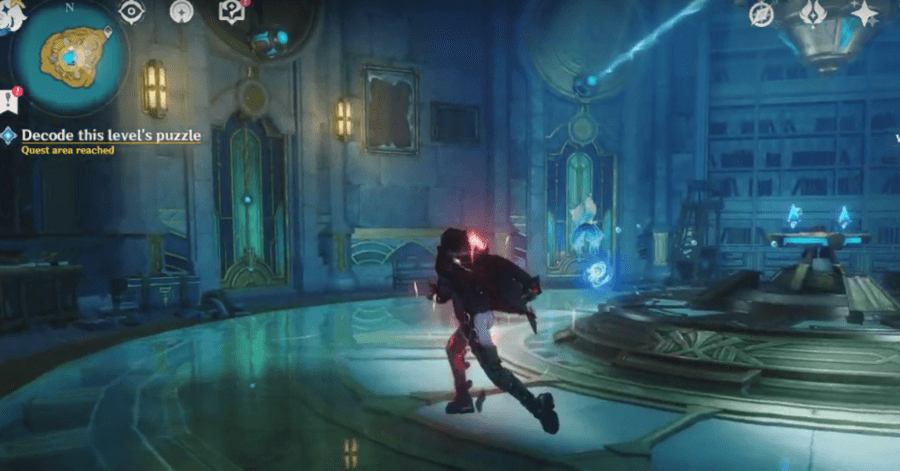
Grab the orb and rotate the lower Eliphas Beam to open the door on the right. This contains another mechanism that will disconnect the lower beam from the upper beam so you can change the upper beam's position freely.

Align the Two Beams and Use Them to Unlock the Left Door

Genshin - unlock the left door

Rotate the upper Eliphas Beam and align it to the lower beam then interact with the first mechanism (the one guarded by the Specialist Mek) to lock the beams again together.

Go back to the Eliphas Beam controller and rotate the beams toward the left door. Now, you just need to move the upper beam "up".

Interact with the second mechanism again to finally unlock the left door that contains the elevator to the lower floor.

Defeat the Specialist Meks and Activate the Mechanism

Deal with the two Annihilation Specialist Meks here. Activating the mechanism will instantly open the next door with another elevator platform.

Obtain the First Root Cycle

Genshin - first Root Cycle

Turn left and grab the orb for the controller. Rotate the lowest beam and point it towards the locked door on the right to open it. Examine the glowing spot inside to obtain the first Root Cycle.

Obtain the Second Root Cycle

Genshin - second Root Cycle

Activate the mechanism next to the Root Cycle to disconnect the upper gear. Return to the Eliphas Beam controller and rotate the upper beams so that the higher beam opens the left door that contains the second Root Cycle.

Do not activate the mechanism next to the second Root Cycle yet.

Obtain the Third Root Cycle

Genshin - third Root Cycle

Go back to the controller and align the upper beam to the lower beam then go back to the previous mechanism and activate it to connect the two gears.

Use the two beams to unlock the central door where the third Root Cycle is.

Bring the three Root Cycles to the center to complete the objective.

Decoding Level Puzzles Information

Part of the Savior's Wake World Quest

Genshin - Savior

You will need to decode two level puzzles as your first objective during In the Wake of Narcissus: Act II, Savior's Wake. This World Quest was added in Genshin Impact 4.2.

Savior's Wake Quest Guide

Genshin Impact Related Guides

All Tips and Tricks Guides

Genshin Impact - Tips and Tricks

All Tips & Tricks Guides

All Version 4.2 Tips & Tricks

Other Tips & Tricks
How to Reveal the Altar's Secrets Decode This Level's Puzzle Guide How to Brainstorm and Find a Breakthrough Guide
How to Search for the key near the Mouth of the Spring Salvage the Lost Items Guide How to Solve the Orthant's Puzzle

Other Quest Tips & Tricks

Other Tips & Tricks
Red Metal Key Location and How to Use How to Get Shiny Shells (Natlan) How to Complete the Oracle Pillar's Picture of the Clans
How to Accept and Undergo the Trials with Princess Cimest How to Capture the Mastermind Place of Rebirth Puzzle Guide
How to Restore Power to the Left Arm of the Giant Machine How to Pass the Trials in Khaj-Nisut How to Continue Exploring the Ruins in Lost in the Sands
How to Connect the Oracle Pillars to Thread Them How to Complete the Trial in the Cave of Eerie Murmurs Anti-Raiden Shogun Training | Chapter 2, Act 3 Guide
How to Rebuild the Golden Aqueducts for Part 1 and 2 How to Return the Flying Bird Phantasms How to Take the Blank Score
How to Break the Chains that Bind Scylla How to Try to Make Contact With Xiao Fantastic Compass Puzzle Guide and How to Enter the New Space
How to Chase the Butterflies Into the Medicine Jar Complete the Chenyu Vale Scenic Photography Contest How to Collect the Scattered Adeptal Energy
How to Investigate the Stone Shrine How to Prepare for the Rainjade Rite How to Enter the Defiled Chambers and Search for Spenta Hearts
How to Break the Treasure Seal How to Clear the Bubble Formations Perform According to the Drum's Score
How to Find a Way to Connect to Nahida's Consciousness How To Proceed Deep Within the Mysterious Ruins using the Pillar Puzzle Go to the Furry Mask Demon King's Camp in the Courage is in the Heart
Looking Glass Locations Guide Look for Other Kory Drums Guide Retrieve the Anchor at the Institute of Clockwork Applications
Retrieve the Survey Anchor at the Institute Dormitories How to Start the Optical Device How to Recover the Condensing Components
How to Get to the Rumored Pipes How to Go to the Geode Mine Shaft How to Solve the Experimental Focusing Mirror Puzzle
Search the Vault in The Chi of Yore Guide How to Adjust the Position of the Prism to Let it Resonate with the Ore How to Collect Materials Used to Make Magic Pockets
Ask the Locals for Information How to Continue the Investigation at the Abandoned Shrine How to Return to the Abandoned Shrine and Use the Memento Lens to Investigate
Find the Little Tanuki Locations How to Search for the Source of the Strange Voice Konda Village Well Puzzle for A Strange Story in Konda
Find Energy Block Guide for As the Khvarena's Light Shows: Nirodha Open the Ruins' Gate for As the Khvarena's Light Shows: Nirodha How to Use the Farrwick to Link the Circuit and Activate the Machine Door
How to Activate the Central Control Device for As the Khvarena's Light Shows How to Use the Ruin Cannon to Destroy the Golem's Core for As the Khvarena's Light Shows: Nirodha How to Show Julien a Special Sight for An Artist Adrift
Connect the Circuit Guide for As the Khvarena's Light Shows: Nirodha Find Arashakun in the Cave to the East Location How to Explore and Unlock the Tri-Seal Guide
Find A Way Into the Vault Guide Go to the Highest Point of Qingce Village Puzzle Guide Search for Fragments Near the Geo Statues Location and Puzzle Guide
Investigate the Ruin to Search for Fragments Guide How to Investigate the Camp Guide Investigate the Figure in the Sandstorm Guide
Investigate the Hilichurl Camp Guide How to Investigate the Area Guide Look for Clues as to Jeht's Whereabouts Guide
Look for Jeht Guide Defeat the Forces of the Tanit Guide Find Another Way to Enter the Central Area Guide
Look for a Way Back to the Temple Guide Connect the Junctions Guide for Dune-Entombed Fecundity Activate the Device and Open the Gate Guide
How to Open the Ancient Gate How to Activate the Device, and in turn, Another Machine Somewhere Within the Temple Head Over to the Designated Location in the Letter Guide
Siraj's Hideout Domain Guide Place of Swallowing Walkthrough and Puzzle Guide Place of Breath Walkthrough and Puzzle Guide
How to Operate Prism of Khaj-Nisut and Try to Reach the Upper Floor How to Search the Transparent Ruins in Invisible Barrier How to Break Suda's Flow at Three Locations
How to Try to Unlock the Rooms Located Deep Within How to Proceed Deeper Within the Ruins How to Go to the Location Indicated by the Stone Slate
How to Try to Lift the Seal Correct Answers For Setaria As Nabiya, Akim, and Qishan in Archon Quest Chapter 3 Act 3 How to Defeat Marana's Avatar
How to Connect All Four Relays in the Middle How to Observe the Sumeru Roses to Find the Hidden Song How to Find the Last Place According to the Vibration
How to Adventure with Aranara How to Explore the Dream of the Vasara Tree How to Search for the Inscriptions of Remembrance
Chapter 3: Act 2 Contemplations Guide How to Investigate the Courtyard Far Down the Corridor in Chapter 3: Act 1 How to Activate the Mechanism in The Chasm
City of Hidden Runes Domain Puzzle Guide How to Look for Offerings to Place Before the Memorial

    Walkthrough Menu

    All rights reserved