| << Previous Zone | — | Sonic & Knuckles Death Egg Zone |
— | Next Zone >> |
Death Egg Zone[2] (デスエッグ ゾーン[1] Desu Eggu Zōn?) is the seventh and penultimate Zone of Sonic & Knuckles and the thirteenth and penultimate Zone of Sonic 3 & Knuckles. It takes place within the Death Egg.
Description[]
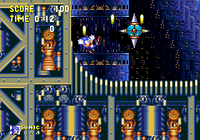
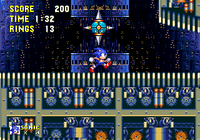
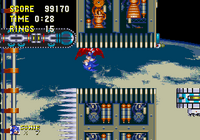
Death Egg Zone is set within Dr. Eggman's massive space station itself. Act 1 takes place inside the ship, while Act 2 takes place outside the ship, with a view of the earth from space.
Story[]
Having successfully relaunched the Death Egg from the Floating Island with the aid of the Master Emerald that he stole from Knuckles in Hidden Palace Zone, Dr. Eggman continues into space with his space station. However, Sonic and Tails has managed to leap onto the rising Death Egg from a tall pillar in the Sky Sanctuary Zone. From there, Sonic battles his way through a horrendous Zone full various dangerous contraptions and some very mean Badniks. After defeating a number of Eggman's more dangerous robots, the last one being the Death Ball, Eggman tries fleeing from Sonic, leading Sonic into the final fight against the Giant Eggman Robo, a mecha robot powered by the Master Emerald. In the end, Sonic destroys the Giant Eggman Robo, and the gargantuan robot falls for good as the Death Egg begins falling apart due to its collapse. Eggman then flees from the scene in his Egg Mobile with the Master Emerald, but is quickly stopped by a few hits from Sonic. The Death Egg then completely crumbles, removing Sonic's foothold. From here, the subsequent story events will depend on the player's progress and the playable character:
- If Sonic has obtained all of the Chaos Emeralds/Super Emeralds, he will progress to The Doomsday Zone after the Death Egg's destruction.
- If Tails has obtained all of the Chaos Emeralds, he will reclaim the Master Emerald and descend back down to earth with Sonic on the Tornado catching both of them and return the sacred gem back to the Floating Island.
- If Sonic and/or Tails did not obtain all of the Chaos Emeralds, the Master Emerald will remain in space and the Floating Island will remain in the ocean, but now free from Eggman's control. In the post-credits scene, Eggman is shown to have the Master Emerald in his possession.
Gameplay[]
Death Egg Zone is full of various obstacles and gimmicks, such as rocket launchers, anti-gravity chambers, electrical hazards, and Ring Shooters.
Overview[]
Act 1[]
The act takes place inside the Death Egg. The route forks into several paths at the start. Only the routes to the shortcut will be included here. This route will also give the player more time in parts of the stage where they may struggle, for example the pachinko area.
As soon as the player runs in, beyond the step is a Light Bridge, patrolled by a Spikebonker. This bridge is solid while the particles are visible. Below the gap is a quarter-slant pit with a Chainspike and an upside-down spring positioned to slide the player back out. To the right is a scaled platform with a wall to the right which is too high to jump over normally. Stand on the left side of this platform to raise the platform on the other side, creating a stairway. The further to the edge the faster the platform will swing, but too much momentum will cause the platforms to fall down. If it fails, there is another quarter-slant pit below, with a Dash Panel helping the player speed out. Beyond the circulating fan atop this wall is a road leading to another Dash Panel with the gap temporarily covered by a particle bridge which leads to a turbine. The beam bridge is the first marker in which the road splits into two.
- If the player takes the turbine, they mustn't let go while it rides along the conveyor-belt until they're past the electric current on the left. To the left is a dash panel which leads to a step blocked by a spring, which will send the player into the current if they're not careful. Jump over the step and continue left where the player will find a Water Shield parked at its dead end. Above is a particle-controlled platform which sends the player up to the ledge above, but it is patrolled by a Fist Launcher: A machine which fires blue fists in a straight horizontal line; so jump to avoid it. A Chainspike will approach from atop the ledge. Attempting to hit a Chainspike comes with a high risk of losing rings, so avoid them. The road on the right leads to an anti-gravity chamber designed in an S-shape. Good timing and momentum is key to reaching the narrow parts of the chamber successfully. Jump over the Spikes. The player will them encounter a particle-controlled platform with a gap below. Instead of taking the road above, drop down to the pit below. Past the hidden wall on the left hand side is a Thunder Shield. Hit it and drop through the middle of the floor, where a cluster of sixteen rings will magnify towards the player. In the pit are three horizontal springs, one of them a step higher than the others. A Spikebonker will appear to their right, guarding the narrow corridor. Past the circulating fan is a particle-controlled platform. Take this one.
- If the player misses the bridge, they can choose to take the tunnel straight across. The road descends a little bit before flattening out. They will bounce off a reverse spring, before encountering a Spikebonker. Take the particle controlled platform, or roll out of the pit below where a Chainspike is.
- Instead of taking the next particle-controlled platform, drop down the lower-right chute past the horizontal spikes. Jump onto the red spring found at the end of this road, and then hold right while jumping. The player will find the hidden tunnel and thus the shortcut route. At the end of this long road is another Thunder Shield (Coin Monitor in Sonic Origins). Below that is a cluster of sixteen rings. The player will land onto the conveyor-belt (Or double quarter-slant pit in Origins). Follow the path to the right. They'll encounter a group of blocks which will convert into a stairway. Dodge the Fist Launcher directly above and jump past the circulating fan to the next series of blocks (Crouch to dodge the Fist Launcher's weapon). Afterwards the player will approach a discharging electric current protected by spikes. Take the turbine to float across it. Two raising platforms are intercepted by two more Fist Launchers. Upon the second, watch out for the retracting spikes protruding from the ceiling of the narrow corridor, as a mistiming will crush the player. Past the fan is another spikes beside a raising platform. At the top of this one, time the jump well to avoid the Fist Launcher and defeat the Spikebonker simultaneously. Past another set of spikes is a zapping electric current protected by a particle bridge. Hold right after jumping over the wall to pass through the locked door. A spring will pop out from the wall, launching the player upwards. To the right is a Star Post, leading back to the normal layout.
- Mind the Fist Launcher after stepping onto the next raising platform. The tunnel leads to the anti-gravity chamber inside a large pachinko-style area. The gravity always attracts the play to the right. The goal is to press the six yellow lights on a pod which moves up and down. Use the up and down keys to maneuver the player about the area, hitting the springs and the tops of bumpers to ascend further left. The lights will turn red upon every press. A chime will sound after all six red lights have been touched. Proceed into the middle of the layout. They'll zoom past the locked door and exit the game, leading to an S-shaped anti-gravity chamber, reverting the gravity back to normal. Take the dash panel along the quarter slants. Past the bump, the player must take the Ring Shooter to its left. It will loop upwards and send the player towards a raising platform. Quickly jump or crouch at this point to avoid the Fist Launcher. To the right is another Fist Launcher beside the step. Pass the circulating fan atop it to the next raising platform, which leads to another Ring Shooter. Taking this one will lead you straight to the Star Post and a descending platform. Alternatively you can head left and descend down, collecting the ring item boxes, but watch out for the Chainspike along the pit to the left of it. The road on the right leads to the mini-boss.
- Instead of taking the next particle-controlled platform, drop down the lower-right chute past the horizontal spikes. Jump onto the red spring found at the end of this road, and then hold right while jumping. The player will find the hidden tunnel and thus the shortcut route. At the end of this long road is another Thunder Shield (Coin Monitor in Sonic Origins). Below that is a cluster of sixteen rings. The player will land onto the conveyor-belt (Or double quarter-slant pit in Origins). Follow the path to the right. They'll encounter a group of blocks which will convert into a stairway. Dodge the Fist Launcher directly above and jump past the circulating fan to the next series of blocks (Crouch to dodge the Fist Launcher's weapon). Afterwards the player will approach a discharging electric current protected by spikes. Take the turbine to float across it. Two raising platforms are intercepted by two more Fist Launchers. Upon the second, watch out for the retracting spikes protruding from the ceiling of the narrow corridor, as a mistiming will crush the player. Past the fan is another spikes beside a raising platform. At the top of this one, time the jump well to avoid the Fist Launcher and defeat the Spikebonker simultaneously. Past another set of spikes is a zapping electric current protected by a particle bridge. Hold right after jumping over the wall to pass through the locked door. A spring will pop out from the wall, launching the player upwards. To the right is a Star Post, leading back to the normal layout.
Act 2[]
This is the outer-segment of the Death Egg. The road slopes down towards a step where there's a backwards spring and a Spikebonker guarding a particle bridge. Fall off this bridge and the player will fall into a double quarter-slant pit with a Chainspike Spin dash side to side to get out, using the springs that pop out the walls to help. Once the gap is crossed the player will enter the anti-gravity chamber and run upside-down. They will head towards a particle bridge atop a conveyor-belt, while under attack from a Chainspike Jump over the wall. To the right and down are two more anti-gravity chambers. You may want to jump over the second one to collect the Thunder Shield and the Super Ring monitor. The player will enter the splitter. The down route is a dead-end, rewarding the player a Thunder Shield; whether the player chooses to go left or right, different challenges will be posed to the player regardless of direction.
- If the player chooses left, they will run upside-down along a road leading to a quarter-slant. They should land on the particle bridge. Above that is a platform with a Flame Shield. To the left is a conveyor-belt/platform which will ascend upwards. Run quickly onto it to avoid getting crushed by the spikes. Mind the spikes and the Fist Launchers. At the top is a discharging current guarding the ceiling. Jump softly over the spikes, and then defeat the Spikebonker, minding the Fist Launcher attached to the right wall. Descend down the platform towards the warp point. Defeat the next Spikebonker guarding the corridor. To the right are two particle bridges. Below the pit is a Lightning Shield on a platform and four rings. Either jump on those bridges, or roll along the pit to get atop it. Jump softly over the step with the Fist Launcher to avoid the discharging current above. Trip the switch to change the gravity, and collect the Water Shield to their left. Run past the next Fist Launcher and the Chainspike and trip the switch again. The player will land on a slope leading to a weighted platform. Land on the far right edge to descend into the tunnel that leads to the anti-gravity chamber, a small pit of yellow springs, and a warp point. Mind the Fist Launcher while ascending up to the wall which leads to the next warp point. Past the locked door is a conveyor-belt and a reverse spring on a step. Defeat the Spikebonker and trip the switch. At this point, to the left is access to a hidden room three Super-Ring monitors. Take the platform to the other side, where the Star Post is located.
- Trip the switch which will take Sonic past the anti-gravity chamber to a double quarter-slant pit with 16 rings. Spin Dash and hold left to pass through the locked door. Hit the red springs to speed along the quarter-slants to grab hold of the turbine. Past the spiked corridor is a particle bridge with a Spikebonker atop the wall. Jump onto it while the enemy is looking away. To the right is a Ring-shooter which leads to a descending conveyor belt/platform, where they'll immediately notice some fist launchers. Jump or crouch to dodge them until the conveyor-belt reaches the bottom. Once past the anti-gravity platform to the left, charge multiple spin-dashes up the quarter-slant. Pop-up springs will appear to help the player reach the ledge on the right. Avoid the horizontal yellow spring and take the vertical one, assisted by more pop up springs. Turn left and trip the switch to change the gravity. To the right are some downward steps with fist launchers on both sides. Take the descending platform, then follow the rest of the route as described in the bottom-most bullet point.
- If the player goes right, they will run upside-down onto a descending platform. To the right is an area patrolled by a Chainspike which consists of some downward steps leading to a spring. Past the spring are some upward steps and a Spikebonker. Past the conveyor-belt is another descending platform. Above it is a particle bridge and a platform with a 1-Up monitor. Once the descending platform turns into a stairway, it leads to a series of them, each one patrolled in various places by Fist Launchers. Holding right long the narrow tunnel will take them to a hidden room, where three Super-Ring monitors can be obtained. The exit is on the left where a door will close behind them. The road opens out into a U-shaped pit with a Chainspike and two platforms. Run past the retracting spikes towards the warp zone. To the right is a particle bridge. Inside the pit are two monitors, a Super-Ring and a Water Shield, and a raised platform, but mind the Fist Launcher. To the right are some spikes guarding the next obstacle: Two platforms hovering over a discharging current. At the end is a Spikebonker patrolling some steps, followed by a Chainspike. At the end of this road is a Fist Launcher and a conveyor-belt. This one act like an elevator which descends the player down and will change direction from right to left and vice versa every time the player touches it. Mind the Fist Launcher and the spikes on both sides. Touch the Star Post on the right.
- The player will pass the anti-gravity chamber upside-down and onto the next conveyor belt platform, which will ascend. Roll out of the pit or land on the platform in the middle and jump out softly to avoid hitting the spikes. To the left is a spike pit and a Chainspike, which they should spin under it to avoid taking damage. Past the locked door is a spring, followed by two more springs which will pop out from walls, one from the right and then one to the left. Past the narrow corridor, descend a step onto the raised platform, but mind the fist launcher and the discharging current above. At the end is a descending platform, which leads to another narrow tunnel past the closed door. Enter the warp zone, which will take the player right-side up. They will see another Spikebonker and a Fist Launcher down a step. After it fires, run along the road past the two Chainspikes, and jump over the spikes and scale the weighted platform to jump up the wall as described in Act 1. This time there's no room for error.
- Past this point are a series of discharging currents on the ceiling. Take the next weighted platform, but watch out for the Fist Launchers attacking on both sides. Past the raised platform is the next Star Post. Defeat the Spikebonker atop a step with two soft jumps once its weapon retracts. Run past the Chainspike into the warp zone, which sends the player upside-down. Run left and jump over the step towards the ring shooter. Right side up past the anti-gravity chamber, spin dash along the quarter slant to ascend past the wall. Past the spikes is another Spikebonker. Jump over the next set of spikes towards the next Ring Shooter. They'll warp into the anti-gravity chamber again, press down and then left to get out. They'll run into a descending ring platform. Run towards the next Ring Shooter, where they'll be taken past a raised platform towards a Super Ring and a Thunder Shield. After taking the stairway, mind the Fist Launcher. Jump to the left to enter the next warp zone, and the following one to the right. Defeat the Spikebonker toward the next descending platform. To the right is a platform with a conveyor belt along the bottom which will travel along the current below, keeping an eye out for the Fist Launchers. It will change direction whenever the player touches it, or if it bounces off a wall. Fall into the narrow gap on the bottom right to escape and reach the Star Post. Beyond the last warp zone is the boss.
- The player will pass the anti-gravity chamber upside-down and onto the next conveyor belt platform, which will ascend. Roll out of the pit or land on the platform in the middle and jump out softly to avoid hitting the spikes. To the left is a spike pit and a Chainspike, which they should spin under it to avoid taking damage. Past the locked door is a spring, followed by two more springs which will pop out from walls, one from the right and then one to the left. Past the narrow corridor, descend a step onto the raised platform, but mind the fist launcher and the discharging current above. At the end is a descending platform, which leads to another narrow tunnel past the closed door. Enter the warp zone, which will take the player right-side up. They will see another Spikebonker and a Fist Launcher down a step. After it fires, run along the road past the two Chainspikes, and jump over the spikes and scale the weighted platform to jump up the wall as described in Act 1. This time there's no room for error.
Bosses[]
Red Eye[]
The boss of Death Egg Zone Act 1 is the Red Eye. The player must damage the Red Eye while minding the spheres orbiting around it. Each time the Red Eye is hit, one of the spheres will explode into several arrows. After all of the spheres are gone, the Red Eye will break out of its casing and will follow the player themselves with two platforms orbiting around it. If the Red Eye is hit, it will attempt to fire a laser while following the player and spinning its platforms rapidly.
Death Ball[]
The first boss of Death Egg Zone Act 2 is the Death Ball, a robot resembling a miniature Death Egg with a yellow Bumper shield that will constantly repel the player's attacks and will periodically drop tanks. The player can only damage the Death Ball by using the gravity switching devices at the right time such that gravity inverts the tanks to land on the Death Ball spike first. If the gravity is inverted, the tanks spawned by the Death Ball will be stuck on the ceiling. If the Spin Dash is used on the stuck tanks, they will be flipped over which can also damage the Death Ball.
Giant Eggman Robo[]
After defeating the Death Ball, the player proceeds to face a giant mech named Giant Eggman Robo. The Giant Eggman Robo attempts to squish Sonic with its three-fingered hands, of which each finger can be destroyed with three hits. After destroying the robot's hands, the mech stomps after Sonic, shooting flames from its nose. A quick hit on its nose tempts Eggman to open the robot's large chest, where the Master Emerald can be seen. This huge compartment also contains a weapon powered by the emerald: a focusing lens which uses the Emerald's power to shoot a laser beam at Sonic. Although dangerous, this cannon is the only weak point on the entire robot.
Trivia[]
- The music played during the fight with Giant Eggman Robo is the exact same music played during the fight with Big Arms in Sonic the Hedgehog 3.
- Unlike Big Arms and most other bosses, the music for Super Sonic/Hyper Sonic will override the boss music.
- Through Act select, Knuckles can enter Death Egg Zone (either through Level Select, completing Sonic/Tails' version of Sky Sanctuary Zone, or by exploiting a glitch in the Sonic Origins remaster of the game), but he is not able to complete Act 1 without Debug Mode on account of his inability to jump high enough to attack the Red Eye on the first phase, and the lack of Climbable walls in the arena. However, Knuckles is still able to complete Act 2, and should the player finish the Act as Knuckles, the game will either send the player back to the title screen without playing a cutscene on original releases of the game, or play Knuckles' usual ending cutscene in Sonic Origins.
- The boss room with the Giant Eggman Robo is placed under The Doomsday Zone Act 2 in original versions of the game.
- Knuckles technically does enter Death Egg Zone normally for the Extreme! Knuckles' Climbing Challenge mission in Sonic Origins.
- In the Sound Test/Act select in original releases of the game, it is spelled without a space in the name, reading "DEATHEGG".
- Aerobase Zone Act 1 in Sonic the Hedgehog Pocket Adventure reuses the music from Death Egg Zone Act 2.
Gallery[]
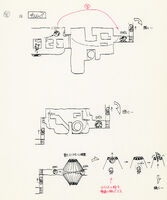
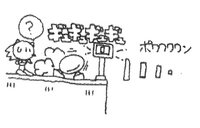
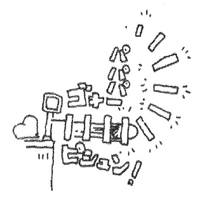
Concept artwork[]
Artwork[]
| Gallery |
|---|
Screenshots[]
Act 1[]
| Gallery |
|---|
Act 2[]
Music[]
| Name | Artist(s) | Length | Music track |
|---|---|---|---|
| "Death Egg Zone Act 1" | Tatsuyuki Maeda, Sachio Ogawa, Masanori Hikichi | 1:45 | |
| "Death Egg Zone Act 2" | Tatsuyuki Maeda, Sachio Ogawa, Masanori Hikichi | 1:42 |
See also[]
References[]
- ↑ 1.0 1.1 Sonic & Knuckles (Sega Mega Drive) Japanese instruction booklet, pg. 36.
- ↑ Sonic & Knuckles (Sega Genesis) United States instruction booklet, pg. 15.

